


The art of tying a tie is one of those timeless skills that everybody should know. But forget about your high school tie which stayed knotted for approximately four years. Apparel caught up with John Crompton from Parisian Neckwear to learn some exciting new knots. So whether you’re styling, merchandising or selling this quintessential male accessory, you’ll have a few more tricks up your sleeve to suit any occasion or customer.
Here’s some tie lingo, so you don’t get knotted up with our instructions: the thick end of the tie is called the blade, the thin end is the tail. The plain fabric underneath the tie, which folds into the tie like the lining of a jacket, is called the tipping. While ties are a formalwear staple, Google reports that their most searched question is ‘How to tie a tie.’
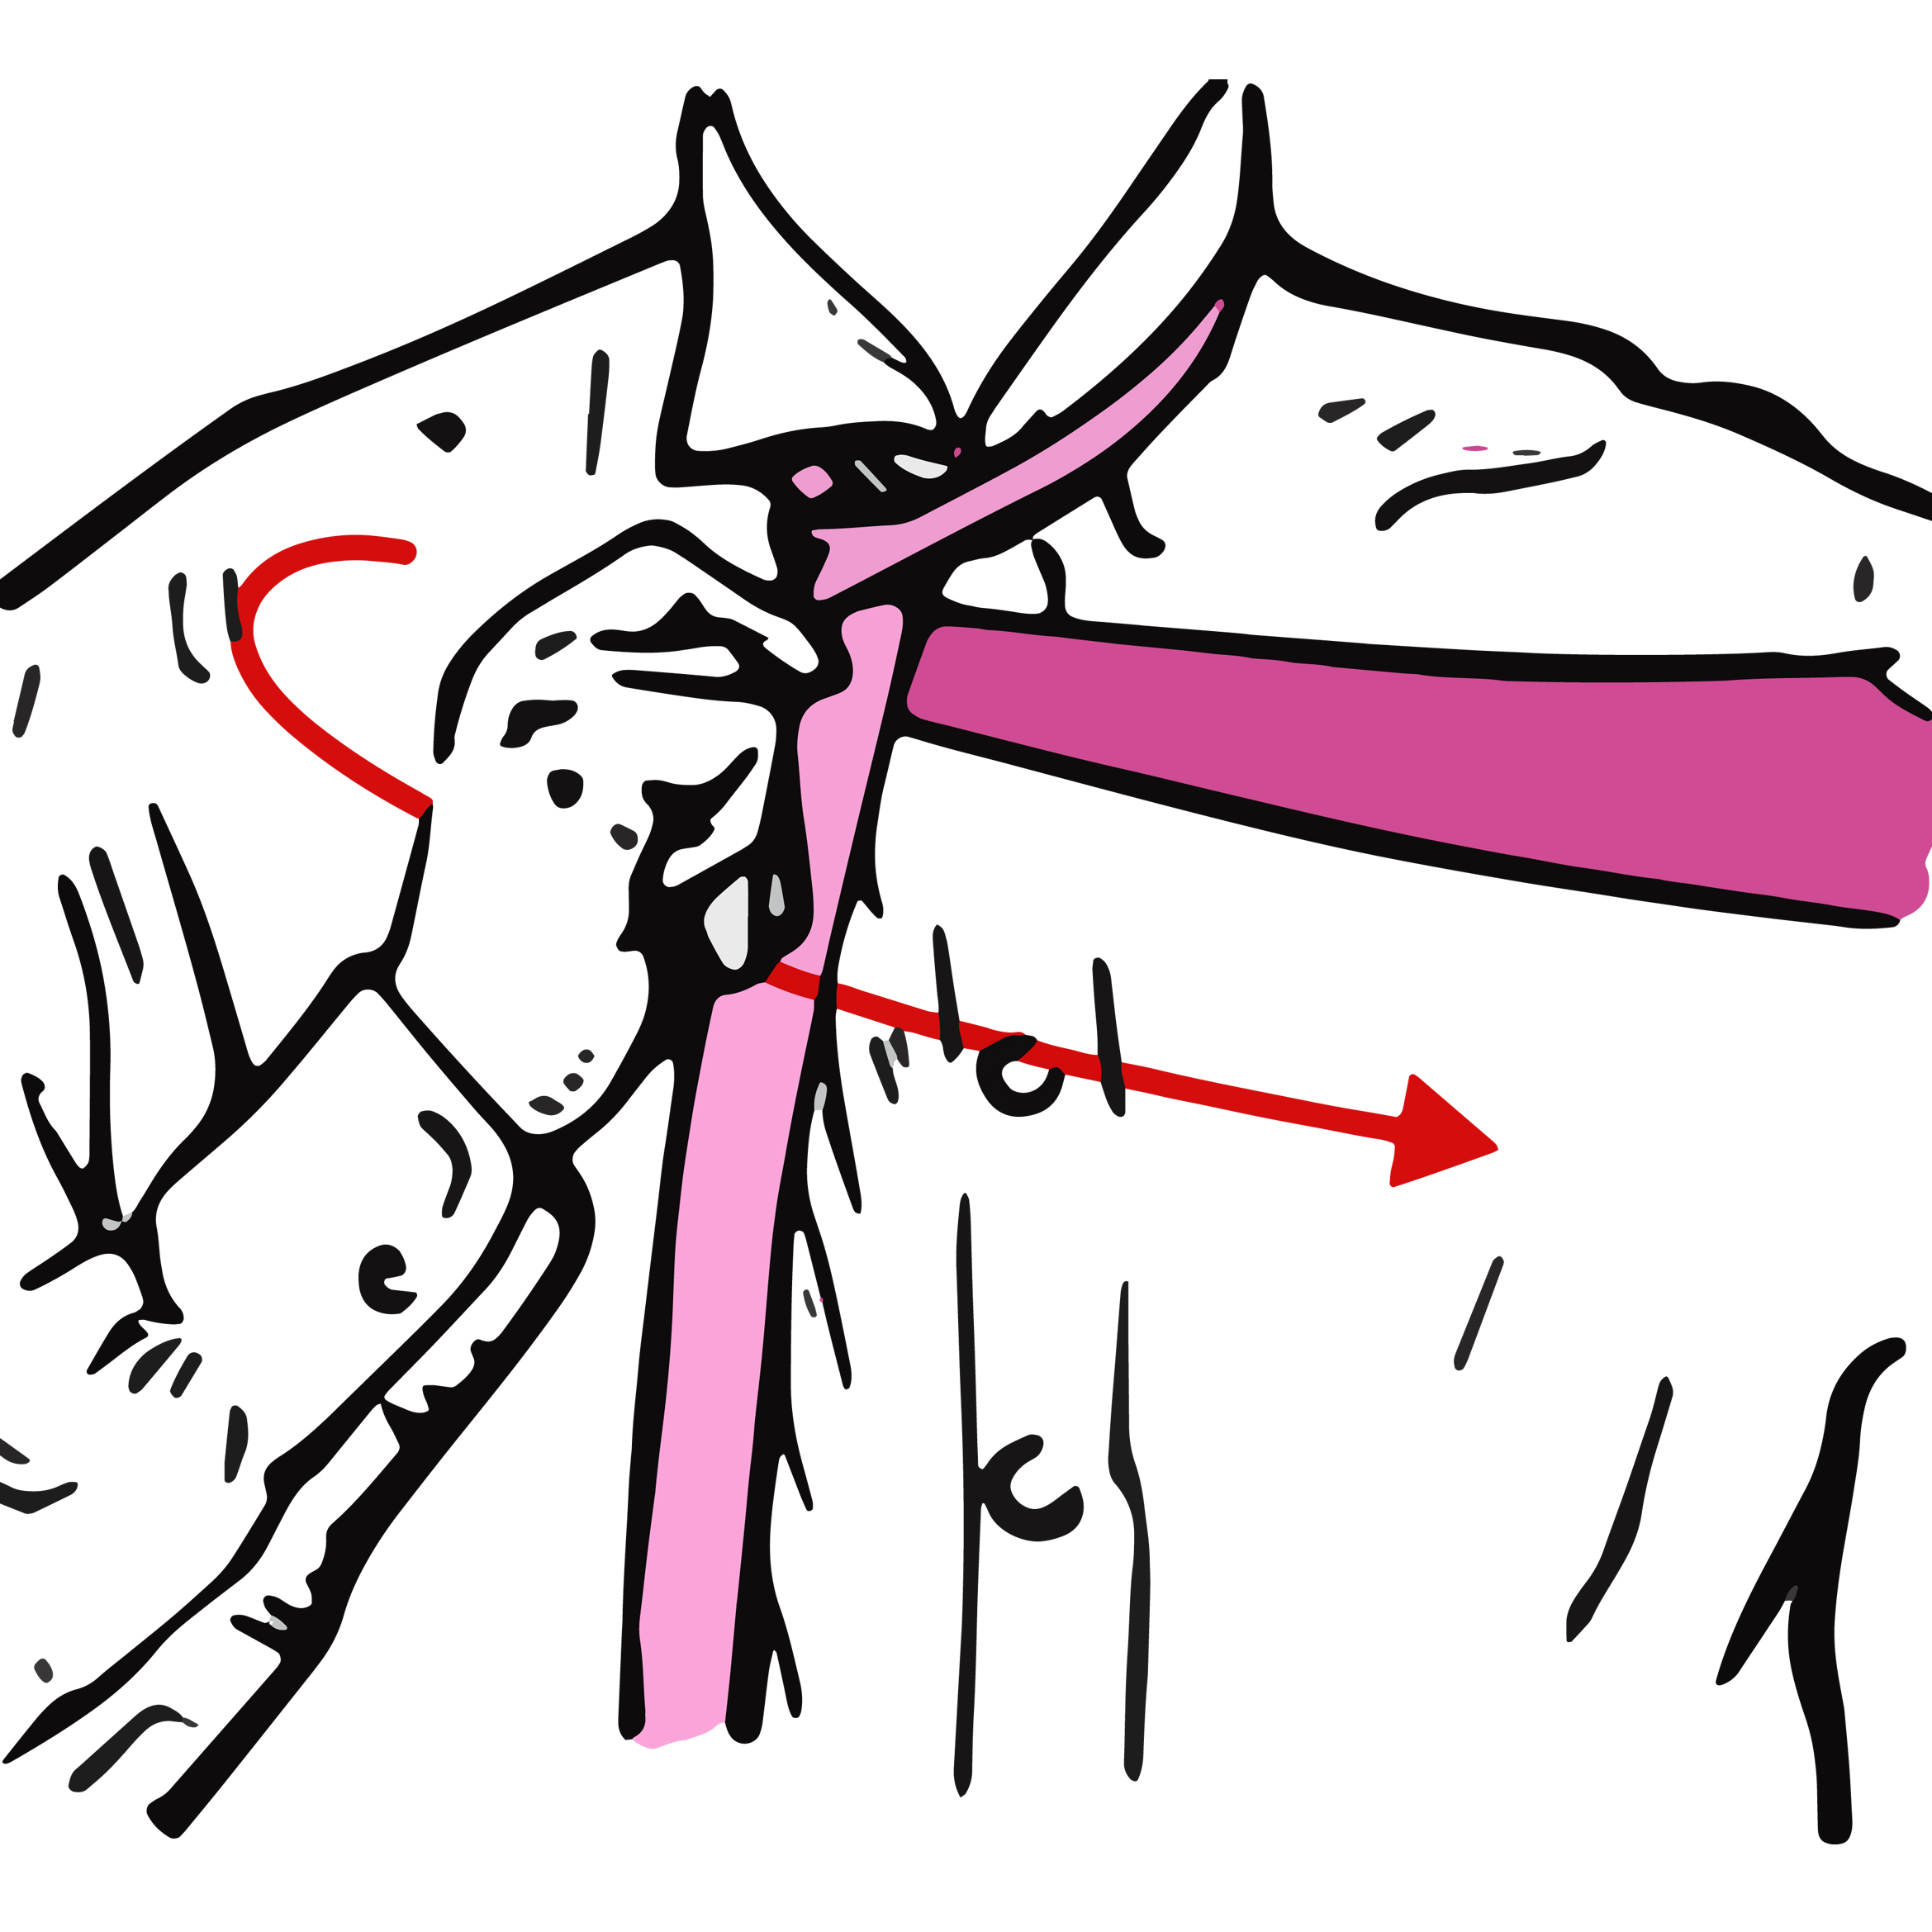
The most basic type of knot is the Four In Hand Knot. This knot is the one most people can tie, as it is easy to remember. The blade should be longer than the tail when placed around the neck, then cross the blade over the tail and cross it back underneath. Pass the blade over the tail again and thread it upwards, between the tie and the neck. Pulling the blade down in front of the tail, thread the blade through the second loop of the tie and pull tightly to make the knot. The Four In Hand Knot is a good knot for beginners, and it uses a small amount of fabric, meaning it leaves a long-looking tie with a slim knot. The knot shape is small and slightly uneven - good for casual tie moments.
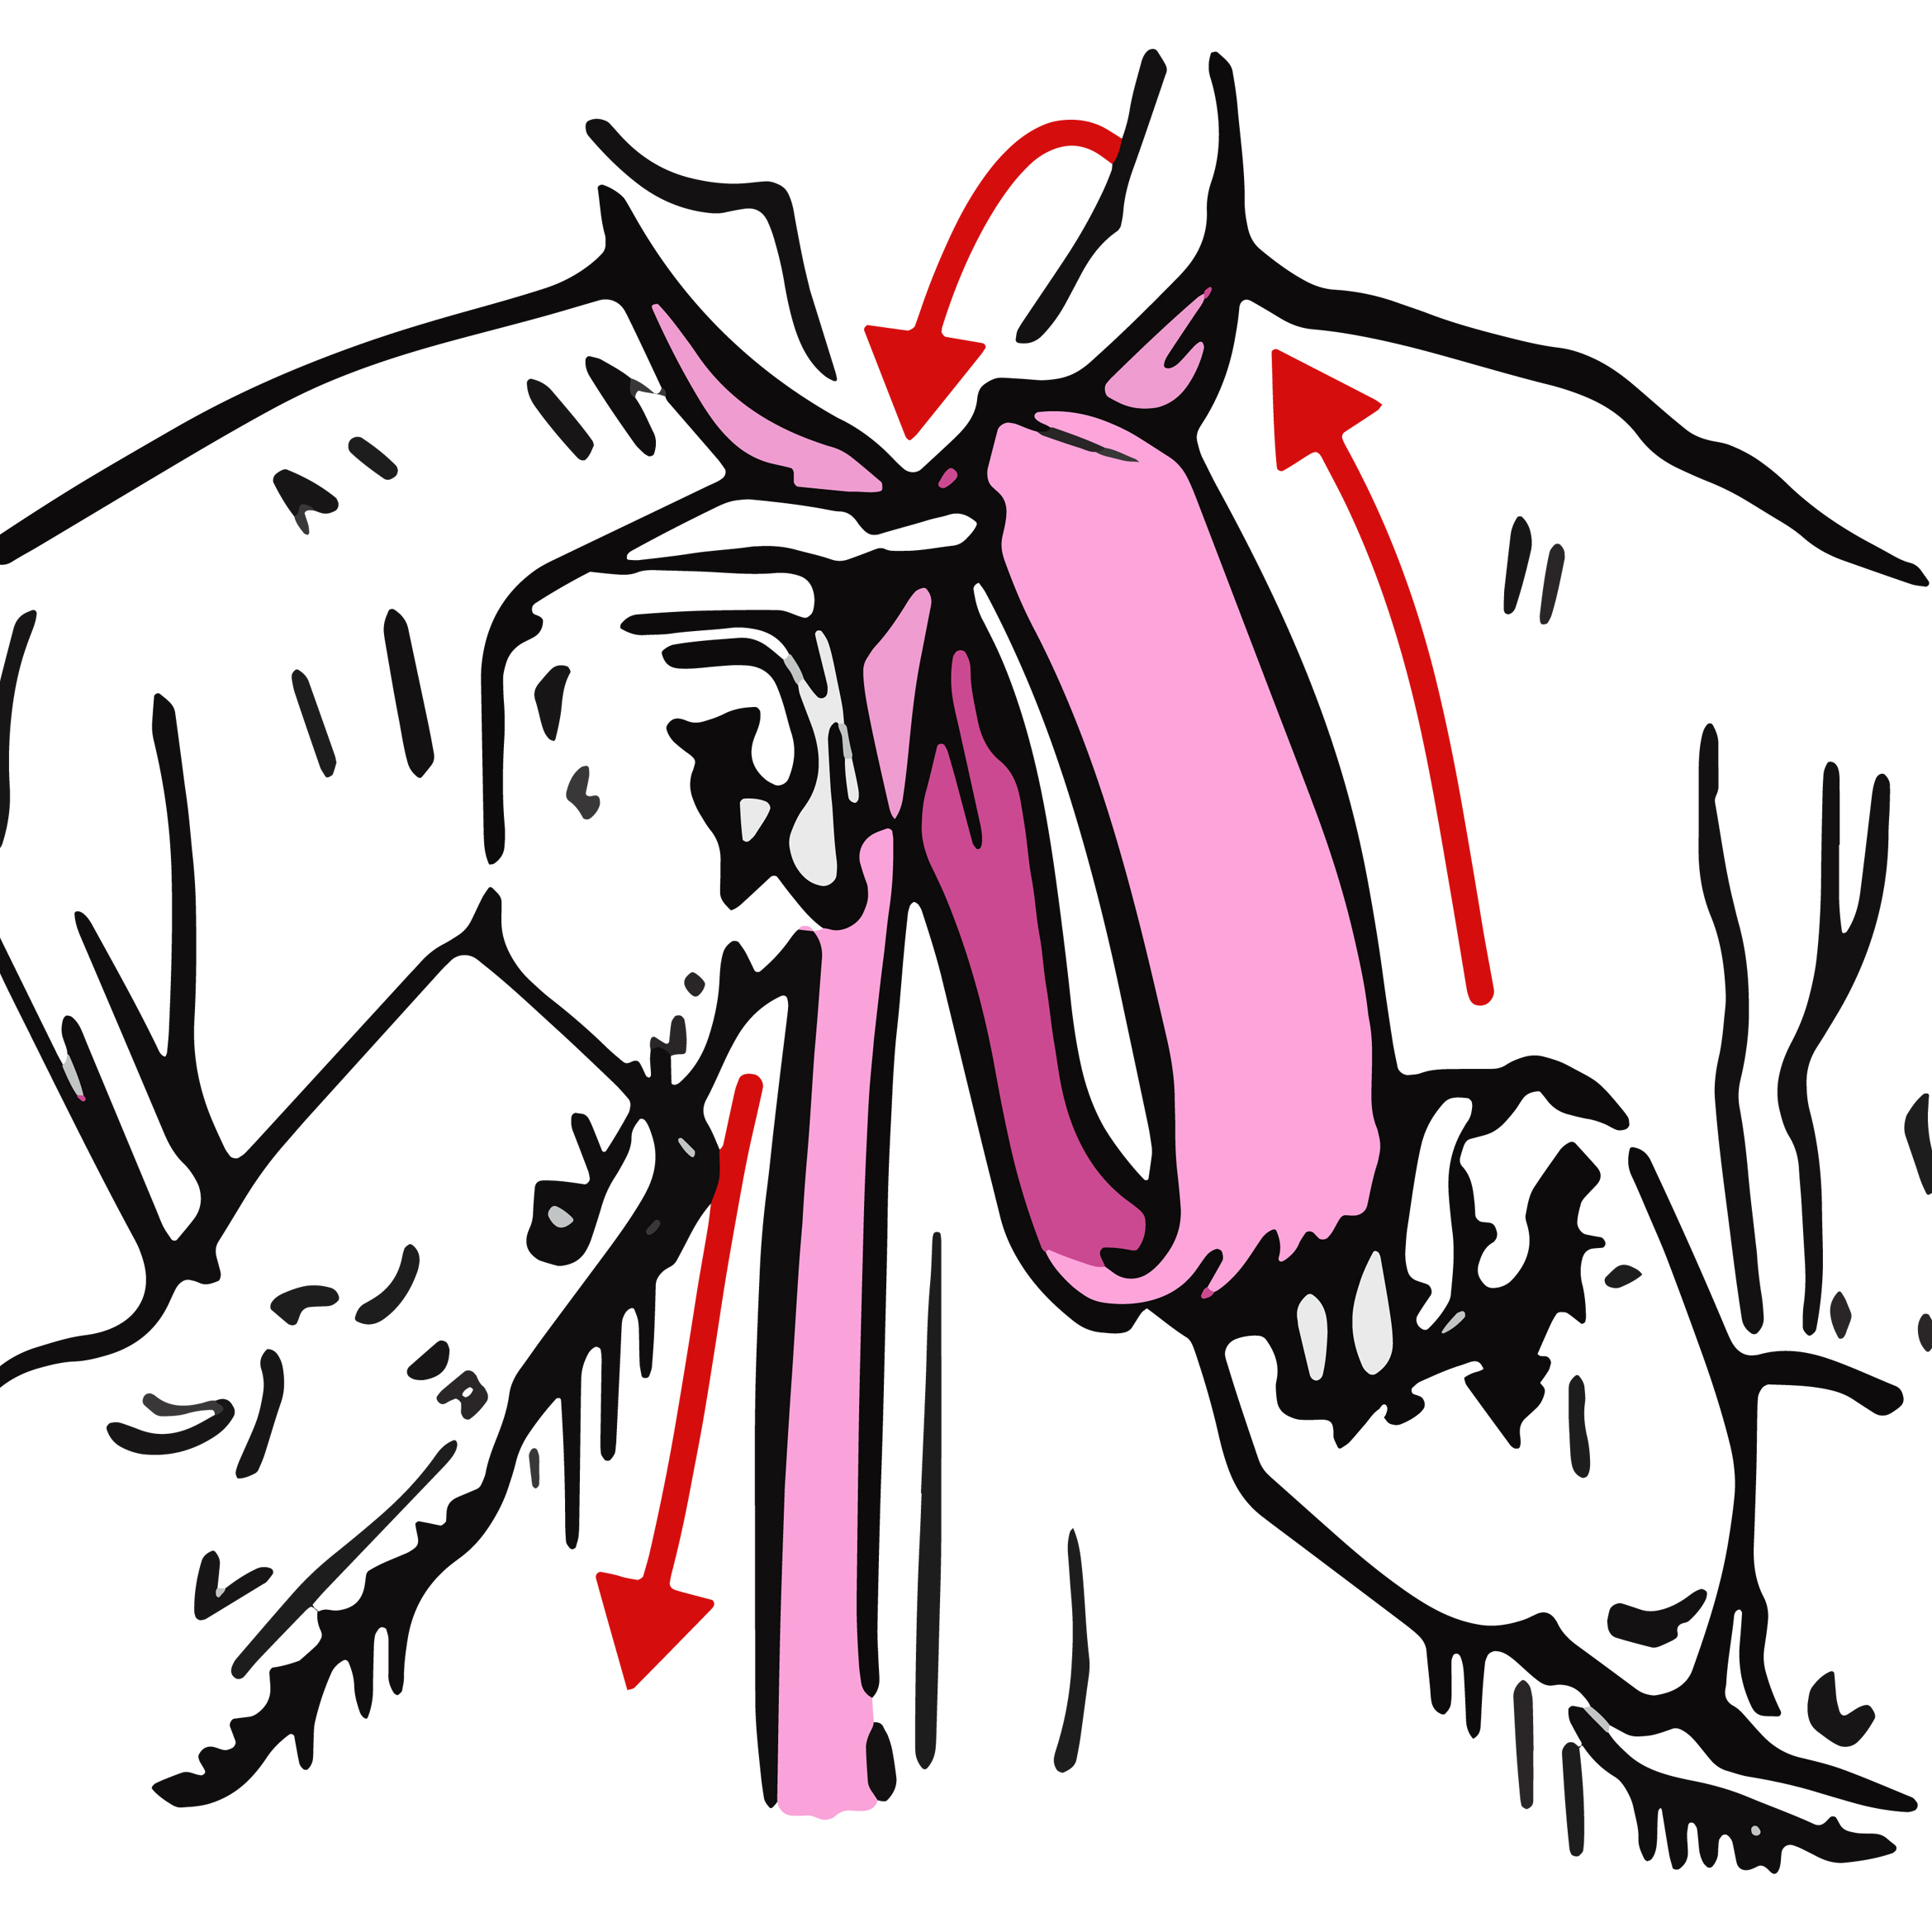
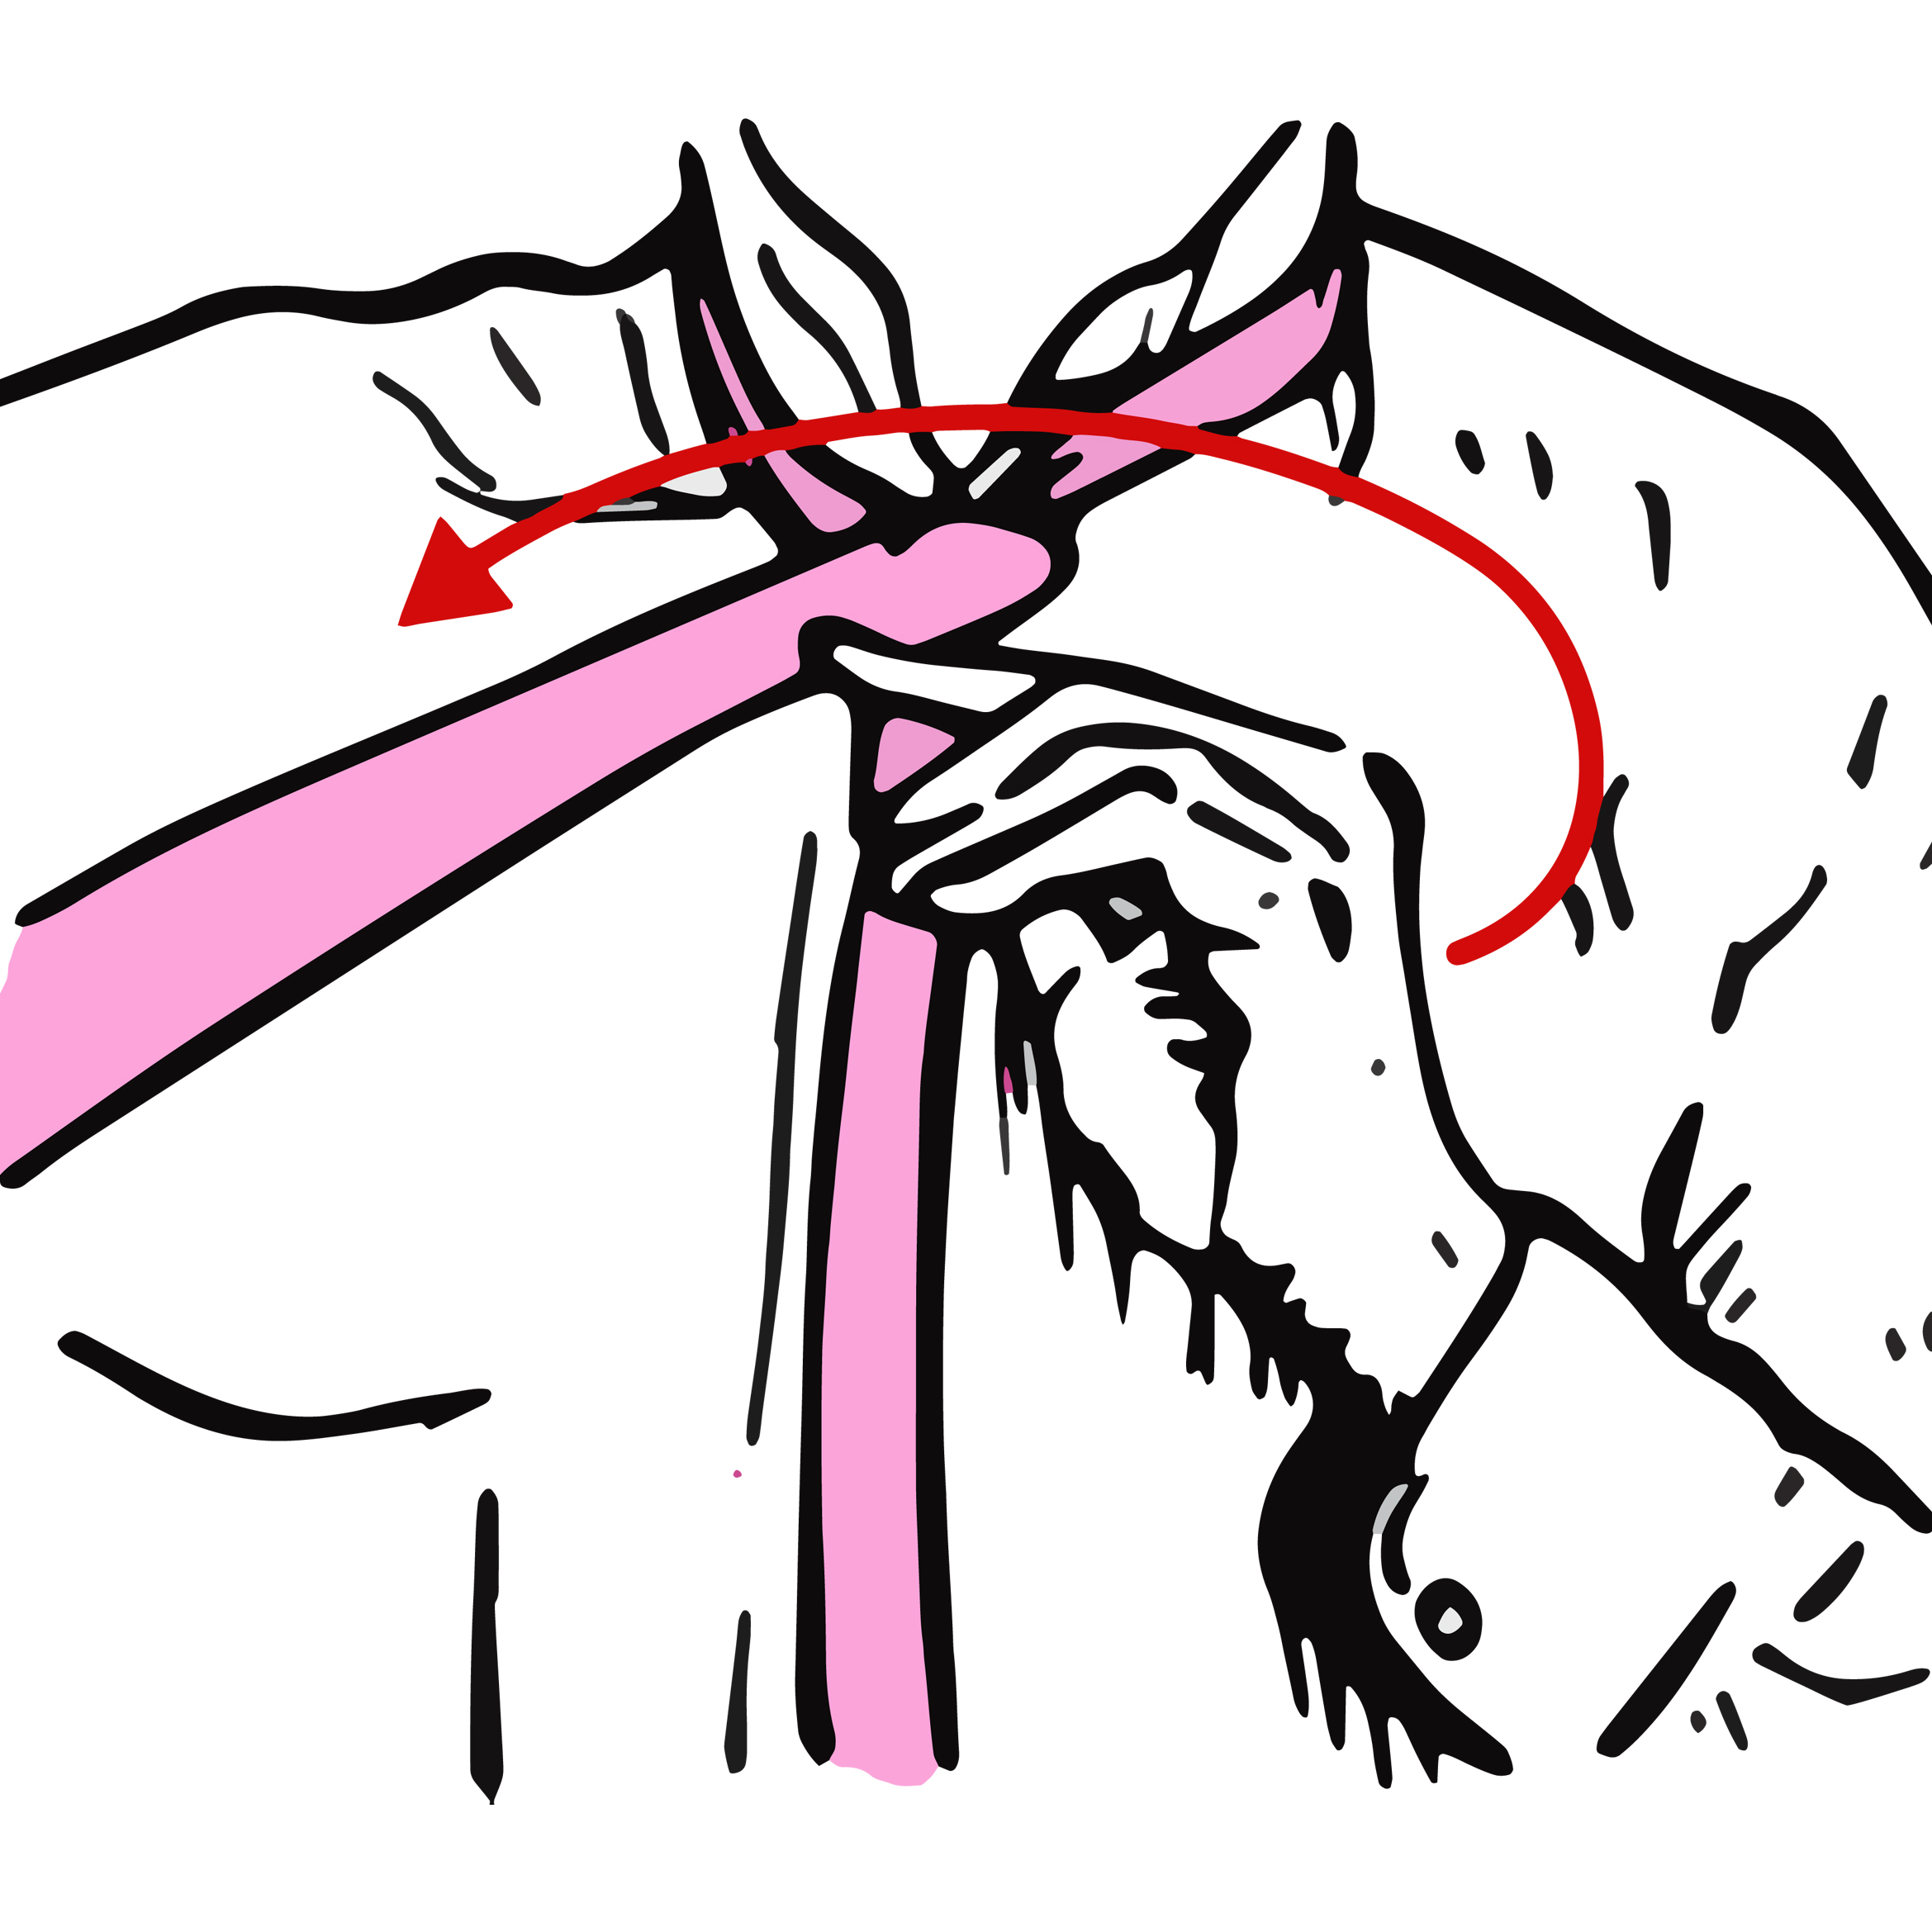
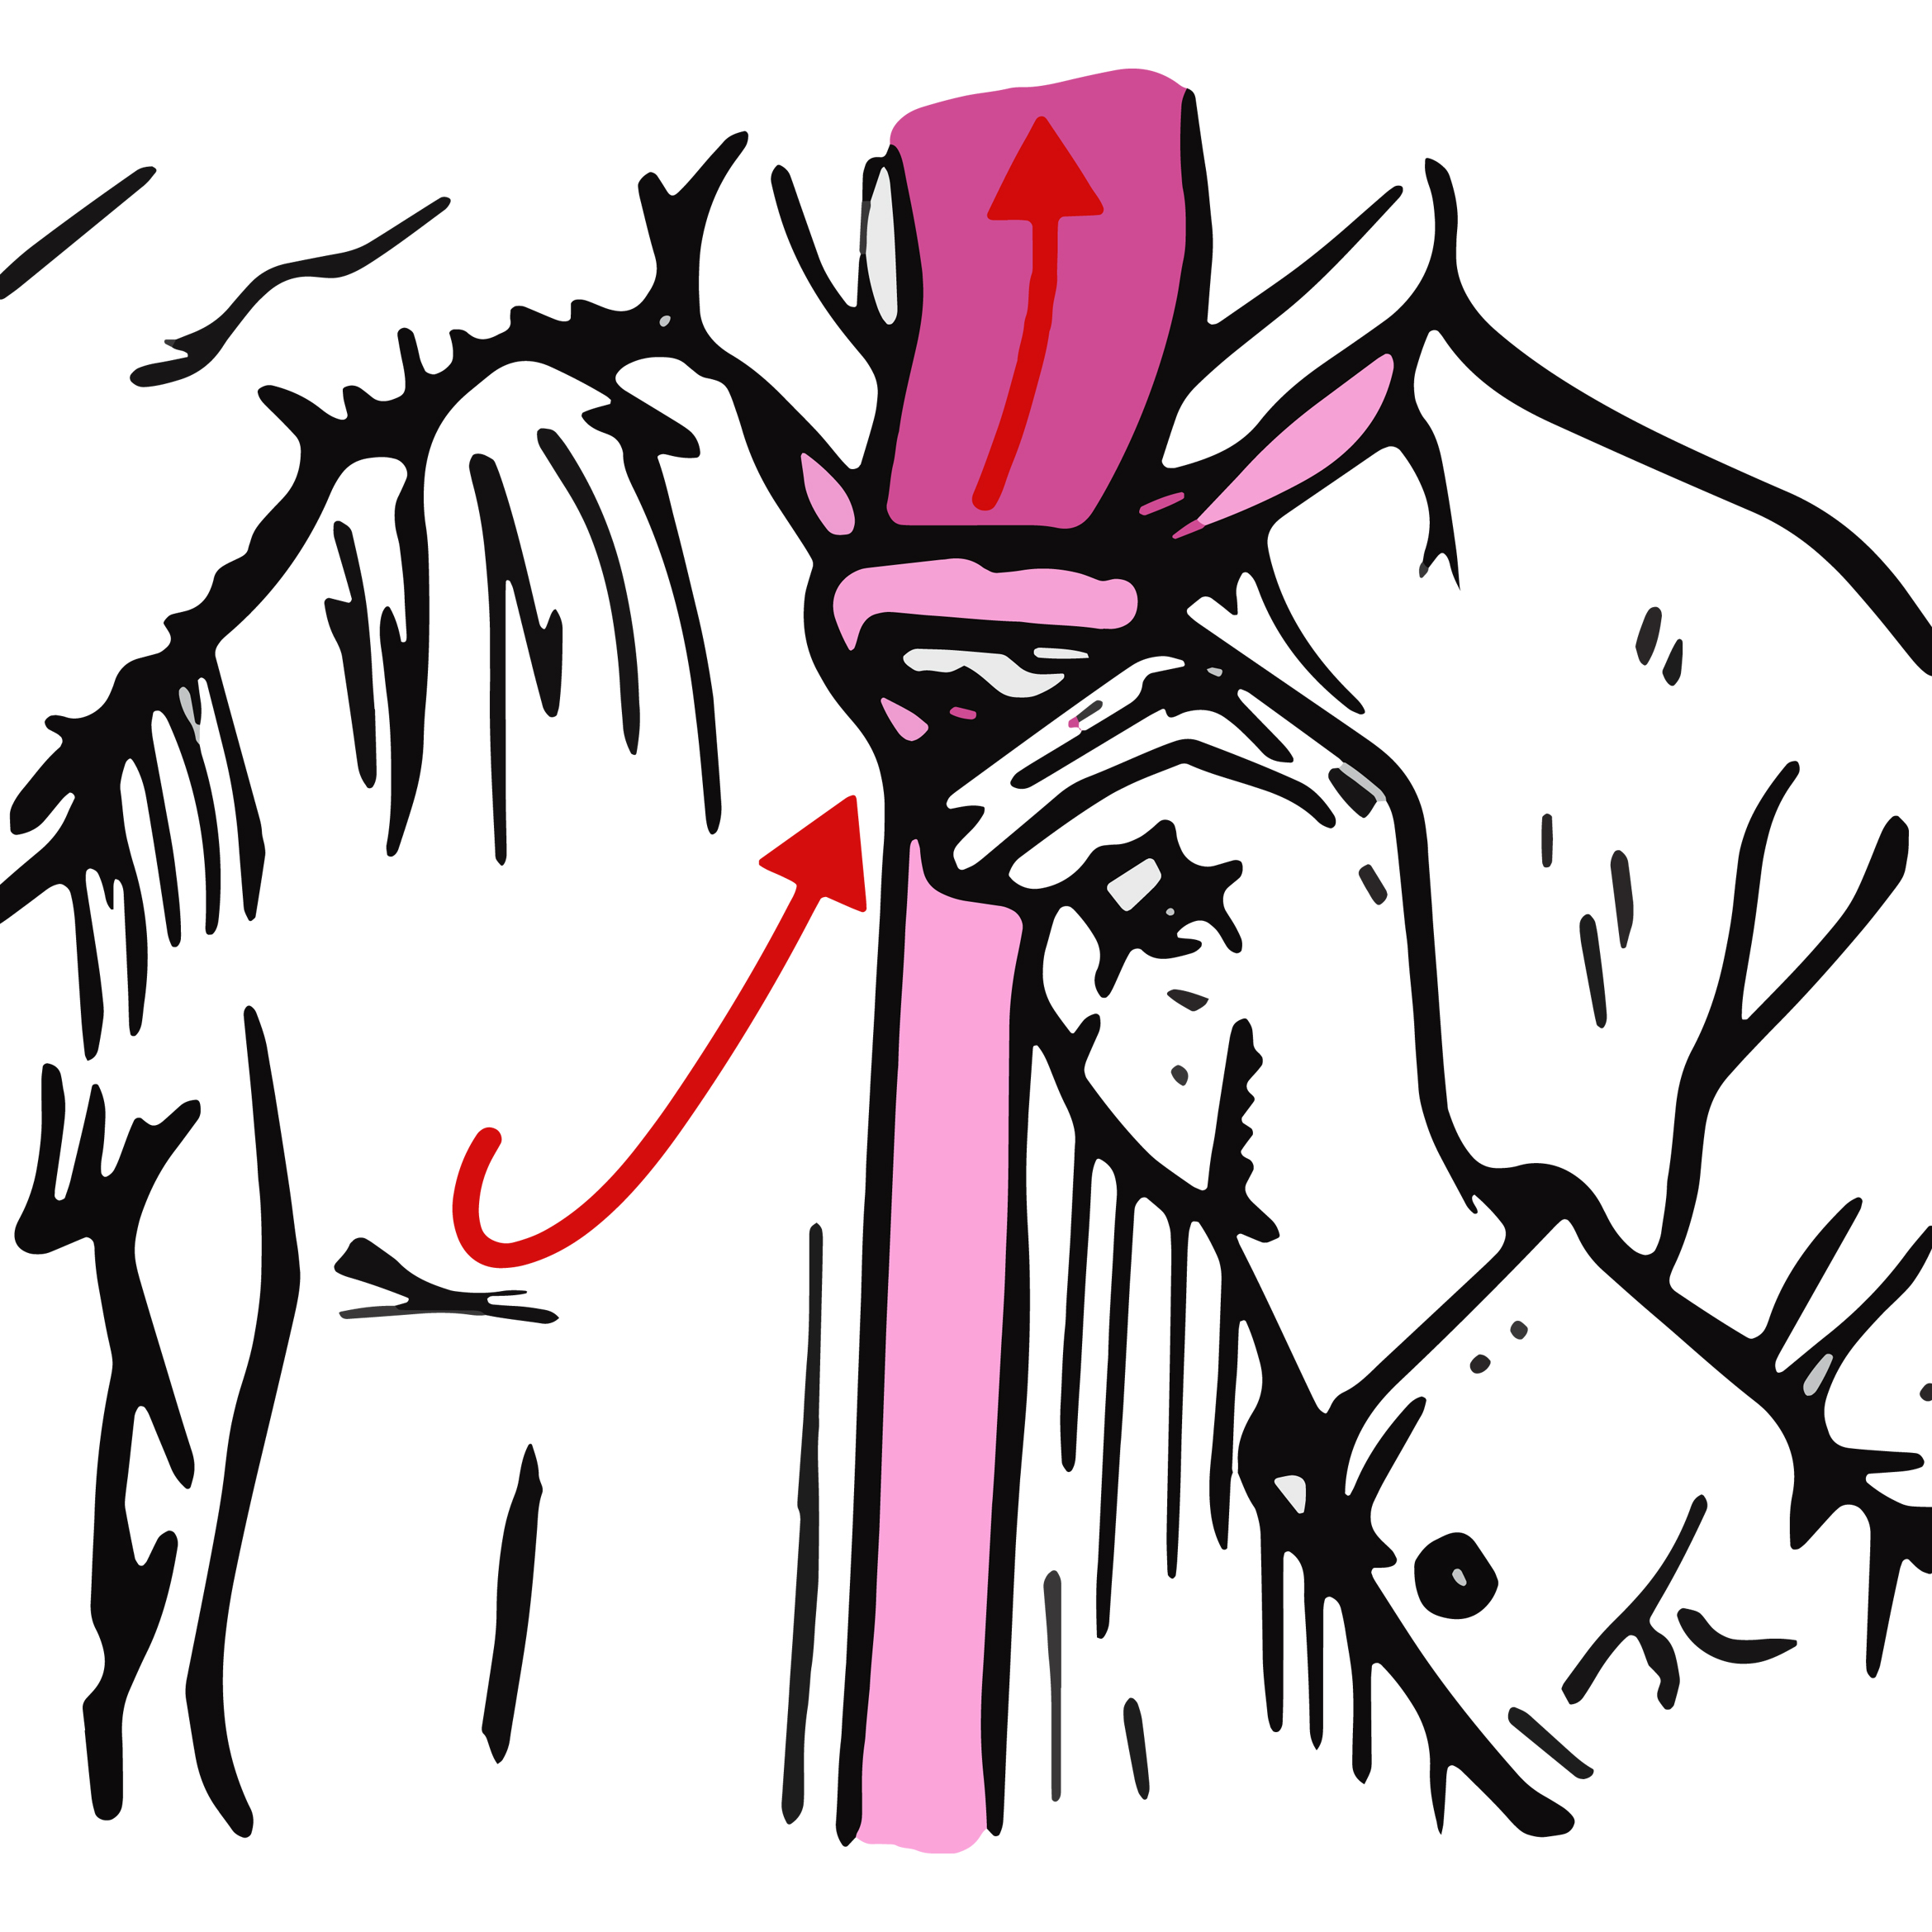
Stepping up the drama, the Half Windsor Knot has a more triangular shape and sounds very fancy. While not as simple as the Four In Hand, the Half Windsor takes more practice, but can easily be perfected by following some simple steps. Start in the same position as the Four In Hand, with the tie draped around the neck - the blade longer than the tail. Cross the blade over the tail and then back underneath the way you came. Here is the difference - instead of passing the blade back across the tail, take it up towards the neck (the tipping should be facing your neck). Tuck the blade down behind the tail and loop, pulling to the side away from where you just came. At this point, the tipping should face away from your chest. Cross the blade back across the tail creating another loop and pull up towards your neck from your chest, so the blade is sitting in front of the knot and tail. Thread the blade through the loop you just made and pull tightly. “Make sure you hold the loops tightly as you are tying this knot, or your knot will drop out the bottom, and it will lose its shape,” explained Crompton, as one Apparel writer struggled with her loopy Half Windsor. Half Windsor knots are medium sized, with an even triangular shape, and a dimple in the blade at the base of the knot. This knot is a little more formal than the Four In Hand; better for weddings and occasions, or when dressing to impress or wearing a wider cut suit.
Crompton also showed Apparel how to tie an iconic bowtie. The trick? Tying them on your thigh, just above your knee where your leg is a similar width to your neck. Start with a half hitch, on the thin part of the bowtie, right before it thickens. Then simply proceed with the bunny years trick you used to learn to tie shoelaces. Tidy it up a little, but don’t make it perfect. “The art of a bowtie is the individuality, it isn’t supposed to be uniform, it’s meant to have personality,” says Crompton. Then simply slip the bow tie off your thigh and onto your neck. Parisian’s bowties have a detachable clasp which means you can easily tie the bow on your thigh and then clip it around your neck.
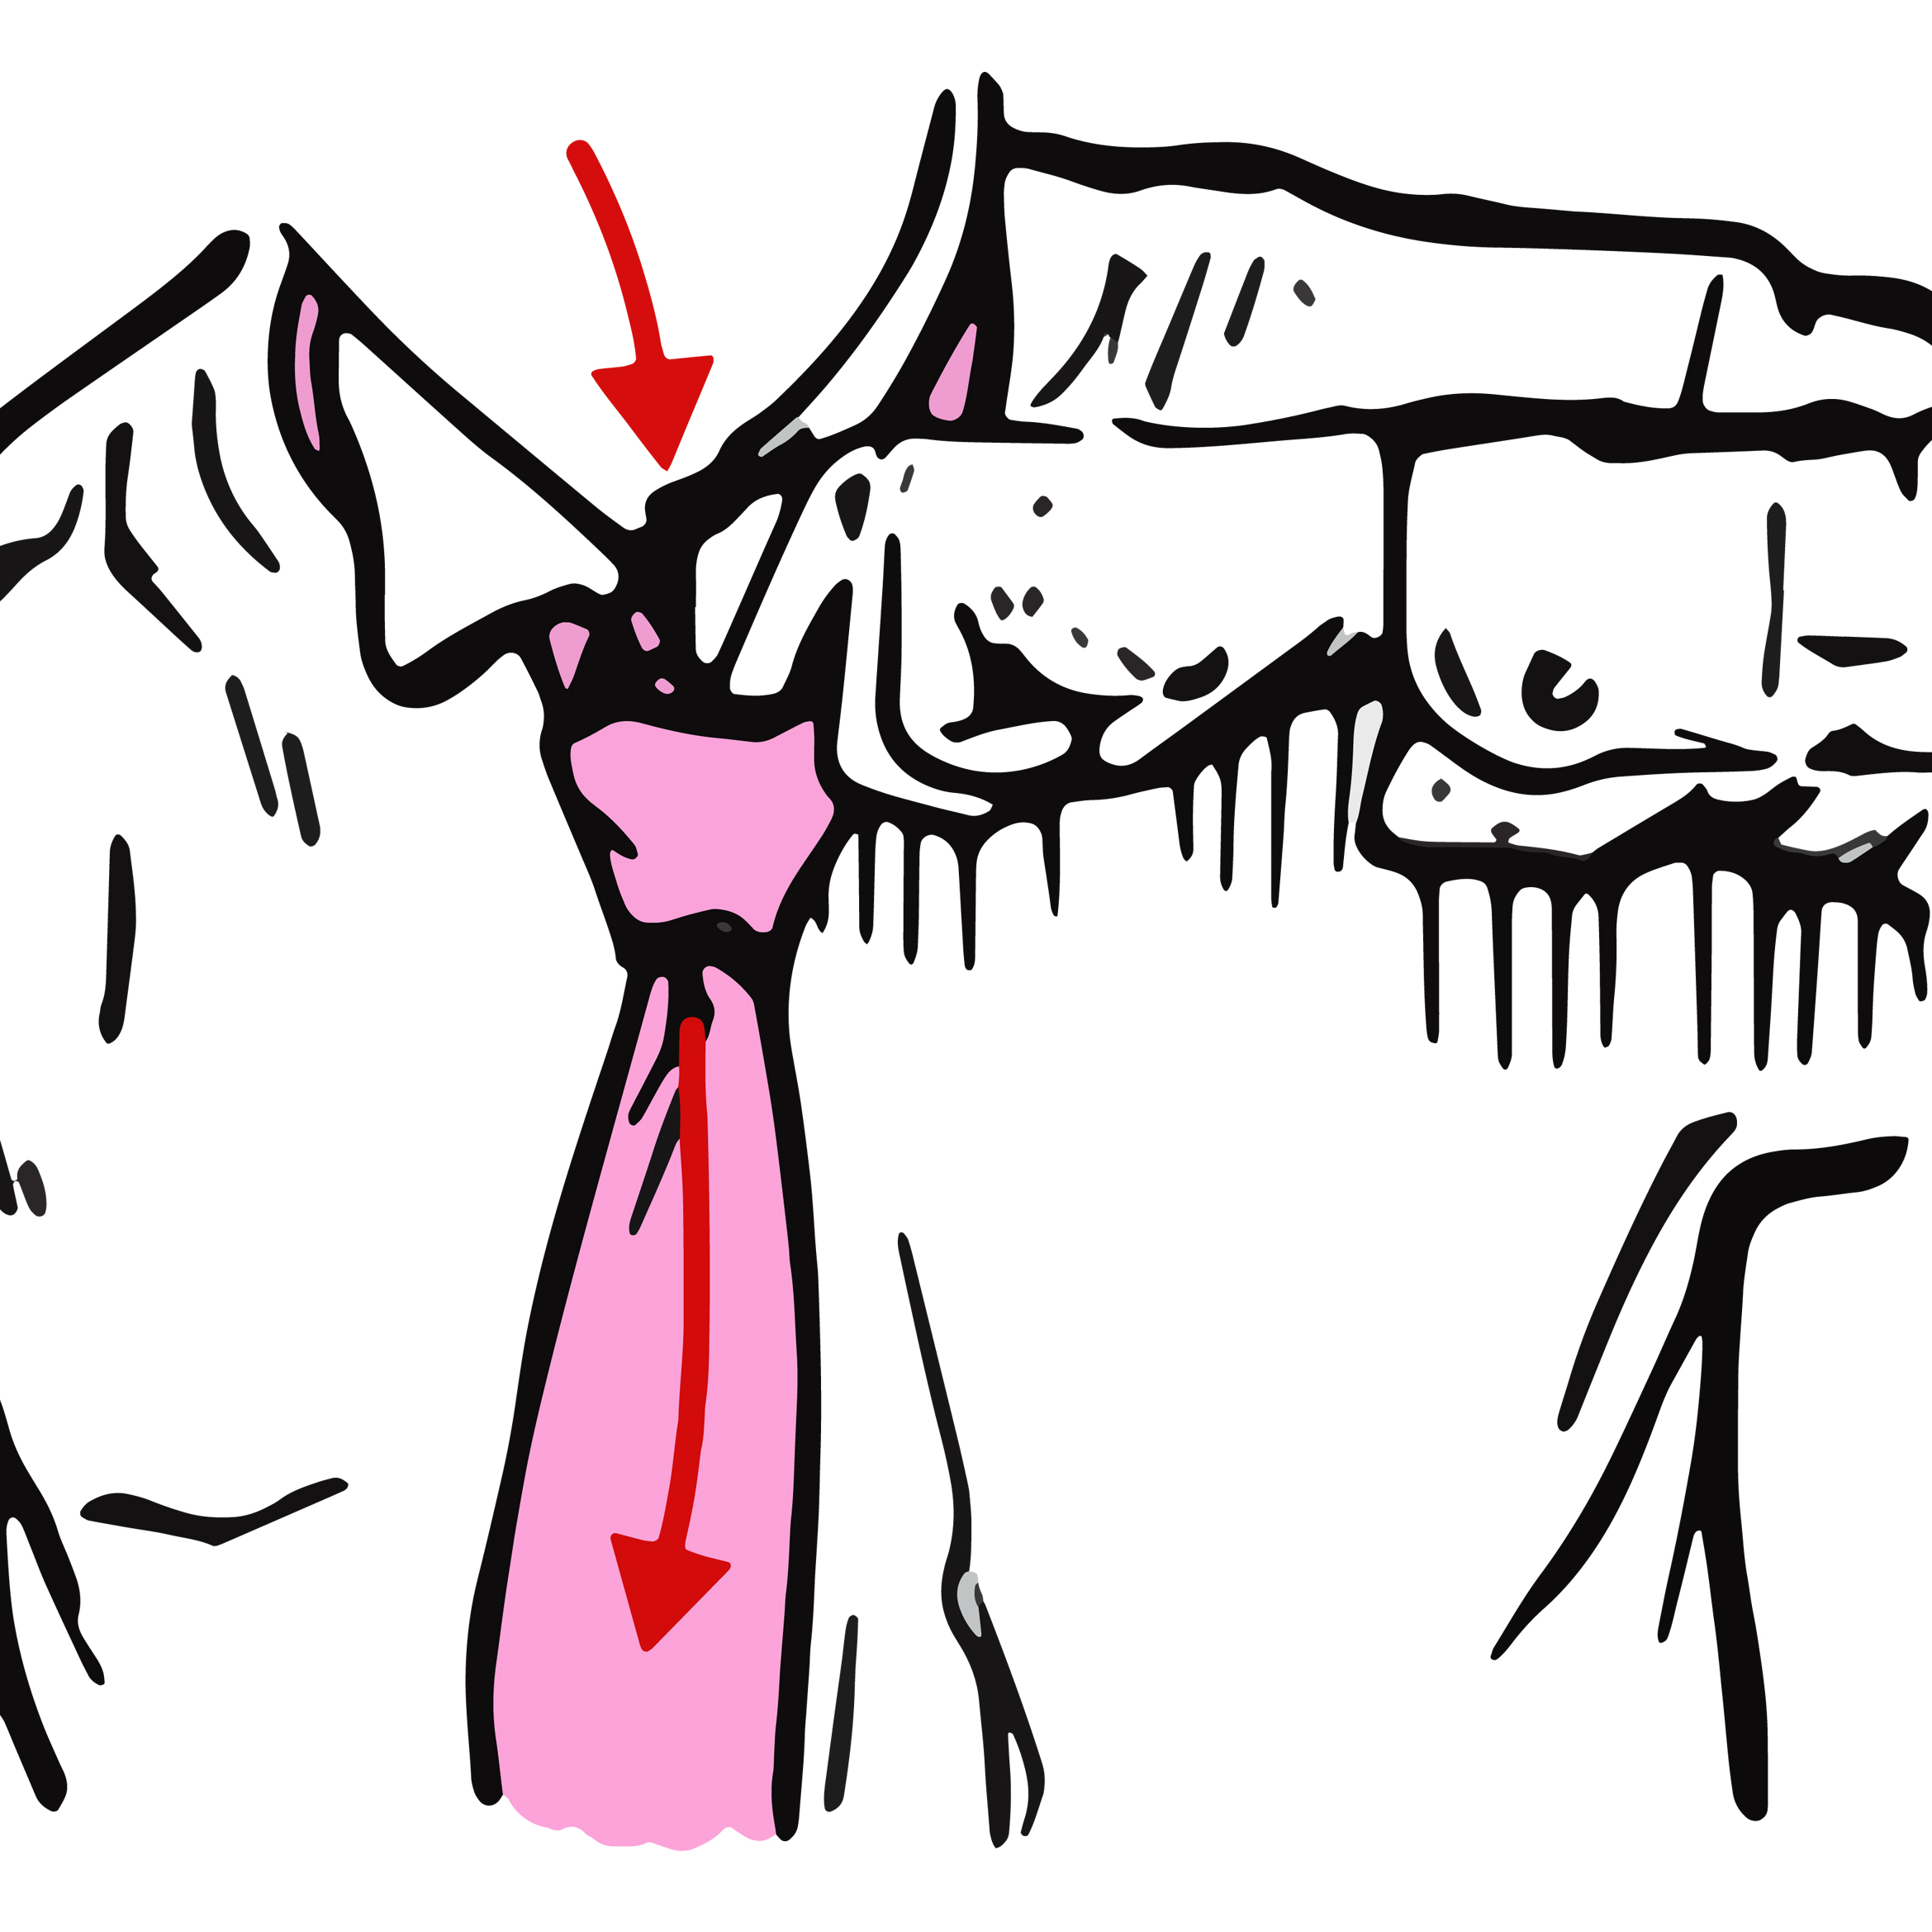
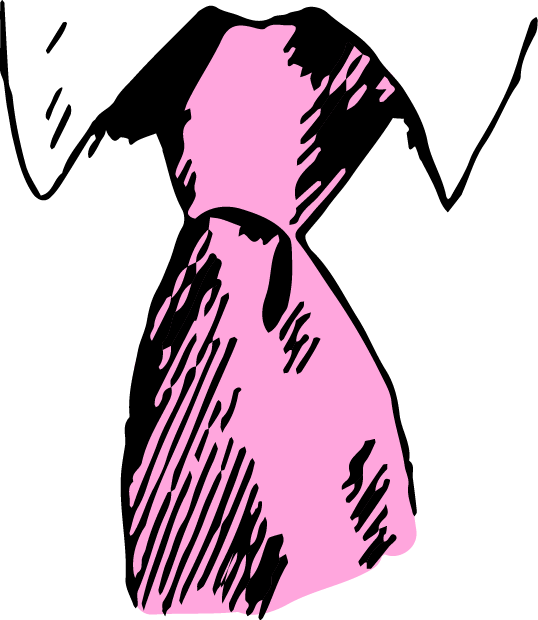
Last but not least; Parisian’s go-to knot. It’s the same as a Half Windsor, but with a few key differences which mean it easily slips undone when pulled (unlike a Half Windsor, which requires untangling). The positioning, first crossover and first loop are the same. When you tuck the blade upwards and then down underneath the loop and tail pull the blade back the same way you came. After that, cross the blade back across the tail - and finish the knot the same way you would with a Half Windsor. The difference is the direction. The result is a slightly more asymmetrical knot,
Here’s a general tip from Crompton; when tying a tie, pop your collar up but leave your top button undone. The reason for this is when the collar is folded down there is strain on the top button. It should instead be done up when the collar has already been folded down, and then the tie hoisted up into position as the last step. Crompton’s final advice; “Practice, practice, practice!”